Showing posts with label breads. Show all posts

28.4.13

she ain't what she used to be...


I am completely humbled, totally in awe of the mothers of young children, and seriously surprised that I raised five children. Five!!! I had forgotten how much energy - mental, emotional, and physical - it takes to more or less successfully navigate the average day with a houseful of young children but four short days reminded me. David and I spent those four days with Eden and Daylan's young'uns. Four busy days with three terrific kids. It was super fun but as David said (and I heartily agree) "the old grey mare, she ain't what she used to be". I had planned to do all manner of things with my days but I did none of them. Instead I played hide-and-seek, walked the long (and very slow) way home from dropping the two oldest off at school each morning, cuddled and read toddler board-books, picked up lego, ran the odd load of laundry, managed to get child-approved meals on the table and kids to activities, teeth brushed, stories read, hugs distributed, and then fall into an exhausted heap at the end of the day. It doesn't sound all that hard but I am out of training.

I loved every precious minute. Even the tottering on toddler-melt-down moments.

A quantifiable, bona fide success was Thursday morning's breakfast. Eden does not feed her children boxed cereal for breakfast, a choice I heartily applaud. But that choice dictates another choice - a more involved meal with more prep than putting out the boxes, bowls, and milk. A sure winner at their table is to serve pancakes. I could have made any one of their regular favourites but made a choice of my own. Happily they loved my choice.

The phrase "going like hotcakes"?  was on a (mental) loop during breakfast Thursday morning. Deacon ate 10 - two at a time on his plate and reaching for the next couple before he had swallowed the bite in his mouth. Aubrie was not far behind and I think Ysa was no slouch. I say think because she was at the other end of the table and I was too busy flipping pancakes to do more than notice that she was eating and happy. 

Super simple, quick to prepare, healthy. Fragrant and delicious, light and fluffy. I was happy to agree to the request for these banana pancakes for breakfast again on Friday morning. I think Deacon confirmed at least 5 times that "you won't forget to blog these, right Grandy?"

This is for Deacon.

banana chia oat blender-pancakes
(gluten-free)

1 cup milk (I used coconut)
1/2 cup plain yogurt
2 Tbsp fresh lemon juice
3 eggs
1 tsp vanilla
1 ripe banana
2 cups large flake rolled oats
1 Tbsp chia seed
1 Tbsp honey
1/2 tsp sea salt
1/2 tsp baking soda
2 tsp baking powder

Put the milk, yogurt, lemon juice, eggs, vanilla, oats, chia seed, and honey in the container of of your blender. Blend on high for a minute and a half or two. Add the salt, baking powder, and baking soda and give the batter another quick whirl.

Bake on a hot griddle. 

We ate ours topped with fresh strawberries and maple syrup. .... As fast as we could :)

Important note: it helps to have an able egg-cracking assistant at your side. I probably couldn't have done it without Aub's help.

20.4.13

coconut, almond, banana & quinoa breakfast cakes


Yesterday I was introduced to a beautiful, new-to-me blog The First Mess. I scrolled through post after post and recipe after recipe, mentally bookmarking every single one! There are food blogs galore and many of them filled with interesting options but this is the very first one that has appealed to me so strongly. I do believe I will have to approach it in the Julie and Julia fashion (minus the craziness) - a recipe a day until I have conquered the lot! Seriously, every single recipe begs me to make it.

Accordingly, first thing this morning I rolled out of our lazy-Saturday-morning-bed knowing exactly what breakfast would be. These breakfast cakes are a little more involved than many of their kin but oh my! with every bite your mind sings "worth every moment" - not that they take all that many moments, just a few more than ... buttermilk pancakes or what have you. More than healthy, more than delicious - these are perfect. The crunch of the quinoa, the mellowness of the almond, the fragrance of the coconut, the caramelled bananas... mmmwha!!  I made a couple of very minimal changes to the recipe as written on The First Mess - basically tweaked the method because I am lazy. Not having tried Laura's method and thus having no true basis for comparison, I may not be in a position to make this claim but I would venture that the shortcuts were not made to the detriment of the cakes. I also opted to throw in an egg because I firmly believe that eggs are good for you. If you wanted to make these gluten-free simply swap the spelt flour for your favourite all-purpose gf mix.

David's take? I quote: (After the first bite and through a full mouth) "these are yummy!" and a few minutes later "top of my list for pancakes". Take that seriously folks - he is somewhat of a connoisseur. For what it is worth, I totally agree. Definite make agains.

And if you are not yet a fan of The First Mess I can promise you a lovely visit if you go. From the pics to the food. Perfect.

coconut, almond, banana & quinoa breakfast cakes
(from The First Mess)

2 1/2 tbsp coconut oil, divided + extra for pan
1/8 tsp cinnamon
1/2 cup black quinoa
1 cup milk of your choice (I used almond)
2 tsp lemon juice
1/2 cup whole spelt flour
2 tsp baking powder
1/2 tsp baking soda
2 Tbsp coconut palm sugar
1/2 tsp fine sea salt
1 1/2 cup almond flour
2 tsp vanilla extract
2 bananas, sliced

cacao nibs, maple syrup, strawberries, and greek yogurt for serving

First cook the quinoa: in a small saucepan melt 1/2 Tbsp of the coconut oil. When it is liquid and fragrant add the cinnamon, give that a quick stir and then stir in the quinoa with a pinch of sea salt. Let that toast up a bit and then add a scant cup of water to the pan. Bring to a boil, then turn down to a simmer for about 15 minutes. If there is any water left in the pan drain it off and let the quinoa cool.

Add the lemon juice to the milk and set aside for 5 minutes or so to curdle. Then add the egg and vanilla and whisk to combine.

In a medium bowl combine the spelt flour, baking powder, baking soda, coconut sugar, sea salt, and almond flour.

Add the remaining 2 Tbsp coconut oil to the cooling quinoa. Since the coconut oil melts at such a low temperature it will easily melt into the quinoa. Stir it all together and scrape the lot into the flour mixture. Add the milk, egg, vanilla mixture to that and gently fold everything together until it is evenly mixed.

Heat a large saute pan over medium heat and brush with coconut oil. Drop the batter by 1/4 cup-fuls onto the hot pan. (If the batter is thick you may need to spread it a bit with the bottom of the scoop) Press 3 or 4 banana slices into the top of the batter. Flip when bubbles form on the top and the bottom is browned.

Serve with a dollop of yogurt, a handful of sliced strawberries, a sprinkle of cacao nibs, and a dribble (or a pour) of maple syrup. Really, truly perfect.

The changes I made were: 
-add the cacao nibs after baking the cakes because adding heat to raw cacao seems a bit ridiculous to me.
-melt the coconut oil into the quinoa and use almond flour instead of using almond meal that is blended together with the coconut oil. One less dirty appliance and one less step.
-add the egg and vanilla to the curdled milk
-strawberries. Because I love berries and pancakes. And because they are just one more layer of good for you.


25.1.12

biscuits


When Thomas and Hannah lived with us for a few months last fall one of the things that was most fun was sharing the kitchen with Hannah. I count myself very fortunate in my sweet daughter-in-law. I love that we have fun together and one of the things we enjoy together is cooking. One day we made biscuits to go with the soup we were having for dinner. I had forgotten how totally addictive good biscuits are! Now that I have been reminded I keep looking for reasons to whip up another batch. These are seriously so quick and easy - and of course, delicious - I think a biscuit resurgence must be on the horizon. 


Since gluten-free has become important for Eden (and I have read some info about how really it is not that great even for those of us who are seemingly symptom free) I decided to try my hand at a gluten-free version. The happy news? Gluten-free biscuits are even better than the regular old white wheat flour variety. And just as easy. 


Add a little honey butter - or a lot, which is the way I roll I must admit - and we will all be rolling happily along. I simply can't get enough. Dessert is not any better.


biscuits
(from Hannah's mom Melanie)


2 cups flour
1 Tbsp baking powder
1/2 tsp salt
1/3 cup butter
3/4 cup milk


Whisk the flour, baking powder and salt together in a medium bowl. Using a pastry blender cut the slightly soft butter into the flour mixture until the mixture resembles coarse crumbs. Pour the cold milk over the flour/butter mixture and using a fork quickly blend until most of the flour is incorporated. Don't over-mix!


Lightly dust a board or counter with flour and turn the dough out onto it. Using your hands press the dough out until it is about 3/4" thick. I use a glass to cut the rounds for the biscuits but you can use anything that strikes your fancy. Place the cut out biscuits on an ungreased baking sheet. Gather the remaining dough together (without over working), press out again and cut out more rounds. Continue until you have used all the dough - when I cut mine out using a glass that is about 2" in diameter I usually get about a dozen biscuits. If you want to skip the re-rolling process you can just cut the dough into rough squares using a knife and transfer those to the baking sheet. Just another look and a tiny bit faster.


Bake at 425 F for 9 minutes or until just beginning to brown. Cool on a wire rack or better yet - eat while hot, slathered with honey-butter or butter and home-made jam. 


Tips for a gluten-free version:


This feels like a bit of a cheat (to call it a version) because really all it entails is replacing the white flour with a gluten-free flour mix. Again, I used the C4C from Williams-Sonoma which I like better than two other commercial mixes I have tried as it is not as grainy. I also used my favorite "So Delicious" Coconut Milk that available in the dairy case to replace the milk. Coconut oil would be a good replacement for butter if you don't eat butter but we do so I didn't sub there. The nice thing about using the gluten-free flour is that the caution to avoid over-mixing really doesn't apply. Since there is no gluten the biscuits stay nice and light instead of becoming tough, which is the problem with over-mixing as it develops the gluten. 
Watch the baking time - I found that 9 minutes was too long for the gluten-free version. 7 or 8 minutes was closer to right.


honey-butter
(in case you need to know...)


This is easy- peasy. Just blend equal parts butter and creamed honey* until smooth. For a batch of biscuits I usually use 1/4 cup butter and 1/4 cup honey. Truly divine.


*If you use liquid honey it works best to beat the two ingredients together with a hand mixer - just makes a lighter spread.


Note: the recipe halves easily and well if you (for some crazy reason) only want to make a few.

13.6.11

Making Pita Bread


I made pita bread. I did and it is so easy and delicious that I cannot believe anyone buys it! (... well, actually I can because I am aware that there is a huge segment of the population that would apparently rather buy convenience pre-made everything than make just about anything themselves but that's another discussion for another time.) But this was really exciting for me because making pita bread is super easy and really fun. It is even relatively fast given that it is a yeast dough and needs a bit of time to rise. I decided quite late* in my  dinner game-plan to take a stab at this bread and I am so glad that I did - it tastes so very much better than the somewhat uninspiring rounds one can buy at the grocery store. I had so much fun and success that I am looking for another reason to make more. Really, I don't know why I have never tried it before!


I used a recipe for Lavash Crackers that I found in The Bread Baker's Apprentice by Peter Reinhart. In a side bar on the page he suggests that the same dough can be used to make pita breads. I doubled his recipe and we all wished that I had doubled that. (My recipe yielded 9 breads that were roughly 6" in diameter.) This dough is kneaded by hand rather than by machine and as I was kneading the dough I wondered why so many people resist doughs that need to be kneaded by hand. I find it to be an extremely enjoyable and even soothing process. Folding the dough over on itself again and again I remembered how I had loved working with clay - largely because I loved kneading the clay in preparation for working with it (that and I loved the whole glazing process). This dough is fairly stiff and becomes nice and silky as you knead it.


The recipe here is the amount that I made...


Pita Bread
(tweaked slightly from The Bread Baker's Apprentice by Peter Reinhart)


3 cups flour
1 tsp salt
1 tsp instant yeast
2 Tbsp honey
2 Tbsp olive oil
1 cup warm water


Mix the flour, salt, and yeast together in a  mixing bowl.


Add the honey and olive oil to the warm water and mix, then add that mixture to the flour mixture and stir just enough to bring it all into a rough ball.


Sprinkle a bit of flour on a table or counter and move the dough to that surface. Knead for about 10 minutes. The dough should be medium-firm, not sticky at all, and stretchy when pulled. 


Put the dough in a lightly oiled bowl and cover with a towel. When the dough has risen for about 2 hours, punch it down and it is ready to roll and bake. 


Preheat the oven to 500 degrees F. Divide the dough into eight or nine equal portions. Roll each portion into a rough circle that is slightly less than 1/2" thick. The breads can be baked on a baking stone or simply on a cookie sheet. (I used a cookie sheet because my oven was already hot and I had forgotten to put the baking stone in - the good news is that the cookie sheet method worked beautifully.) This next bit is the important part. Bake just until the breads inflate and form a pocket. Count to 10 and take them out of the oven with a spatula before they brown. You will want to do this and pay attention to the baking (I know this because I didn't pay close enough attention with the first three pieces). The breads are still delicious when allowed to brown slightly but the whole pocket thing is kind of lost and they become a bit heavy, whereas if removed at the count of 10 mark they are lovely and light as air - very tender and moist. The entire baking time is really very short, just a few minutes but it is quite entertaining to watch, so just enjoy the process and try to not thread skewers or make salad at the same time. As the breads cool they slowly deflate but the pockets are easy to find and use.


We ate our pitas with kebabs, Greek salad and a yummy Feta-mint dip. Absolute yummy heaven.


This would be totally fun and do-able with young children. Next time some of our littles are around I think I may do it with them just for fun.


* late in the plan as in at 2:00pm for a 5:00pm meal. To be truthful I probably wouldn't have started them much before then anyway but I may have worked out a bit more of the other meal details in a different order....but that's another story entirely. lol.

21.5.11

A Sleepover and Cinnamon-Sugar Bread


6:00 AM - Aubrie rolls over, opens her eyes, and notices it is light. Immediately she throws off the bedclothes and both feet hit the floor as she leaps out of bed. I roll over and crack one eye, check the time, and tell her it is too early to wake up. "But it is light!" she responds, surprised at my lack of enthusiasm to greet the day. I (sadly) cannot recall the last time I had that much energy upon awaking. 

Deacon and Aubrie came for a sleepover last night. What a treat! ....for me (aside from the 6:00 AM wakeup). It was even pretty nice to have Aubrie creep into my bed in the dark hours of the morning after a bad dream - only pretty nice because restless would be a good way to describe her sleep. And to be honest, although I hoped for a later wakeup time, I really anticipated that 6:00 would be as late as I could expect. Expecting that, I made bread dough after the kids went to bed last night so that we could make some yummy cinnamon-sugar pull-apart bread for breakfast.

After all I have had to say about healthy breakfasts, I must admit that this does not qualify as a healthy breakfast. It doesn't matter how one tries to justify it or rationalize - this is just not a healthy breakfast. Believe me, I tried. The best I could come up with was (a) at least it is not sugared cereal (which is a joke because as far as sugar goes - this is loaded) or (b) the ingredients are not synthetic or overly processed  - if you don't count the sugar. So, there goes my credibility. But it was a sleepover, at Grandy's, and although I draw the line at feeding my grandkids sugared cereal I wanted them to have fun and to make good memories, so we made the sugar-y bread and I added scrambled eggs and fresh fruit to the menu in an attempt to balance things a bit. I don't know about the balance but we did have a lot of fun.


Cinnamon-Sugar Pull-Apart Bread
(adapted from Joy the Baker )

Dough:
2 1/2 cups unbleached white flour
1/4 cup honey
2 1/4 tsp instant dry yeast
3/4 tsp salt
1/4 cup butter
1/3 cup milk
1/4 cup water
2 large eggs, lightly beaten
Filling:
3/4 cup brown sugar
2 tsp cinnamon
1/4 tsp cardamom
1/4 cup butter, melted

In a large mixing bowl, whisk together 2 cups flour, yeast, and salt. Combine the honey and butter with the milk and melt in microwave just until the butter is melted. Add the water, stir and let stand for a few minutes, or until the mixture is warm but not hot. Pour the milk mixture into the dry ingredients and mix with a wooden spoon. Add the eggs and stir well. Add the remaining flour and stir for about 2 minutes. The mixture will be a bit sticky and rough.

Place the dough in a large bowl and cover with plastic wrap and a kitchen towel. Let rise until doubled - about 1 hour. Punch the dough down. (At this point you can refrigerate the dough overnight and continue in the morning if you want to have the bread for breakfast. If you do you will want to take the dough out of the fridge and let it warm up for about 30 minutes before continuing. )

Butter a 9"x5"x3" loaf pan. Whisk together the sugar, cinnamon, and cardamom. Set these aside.

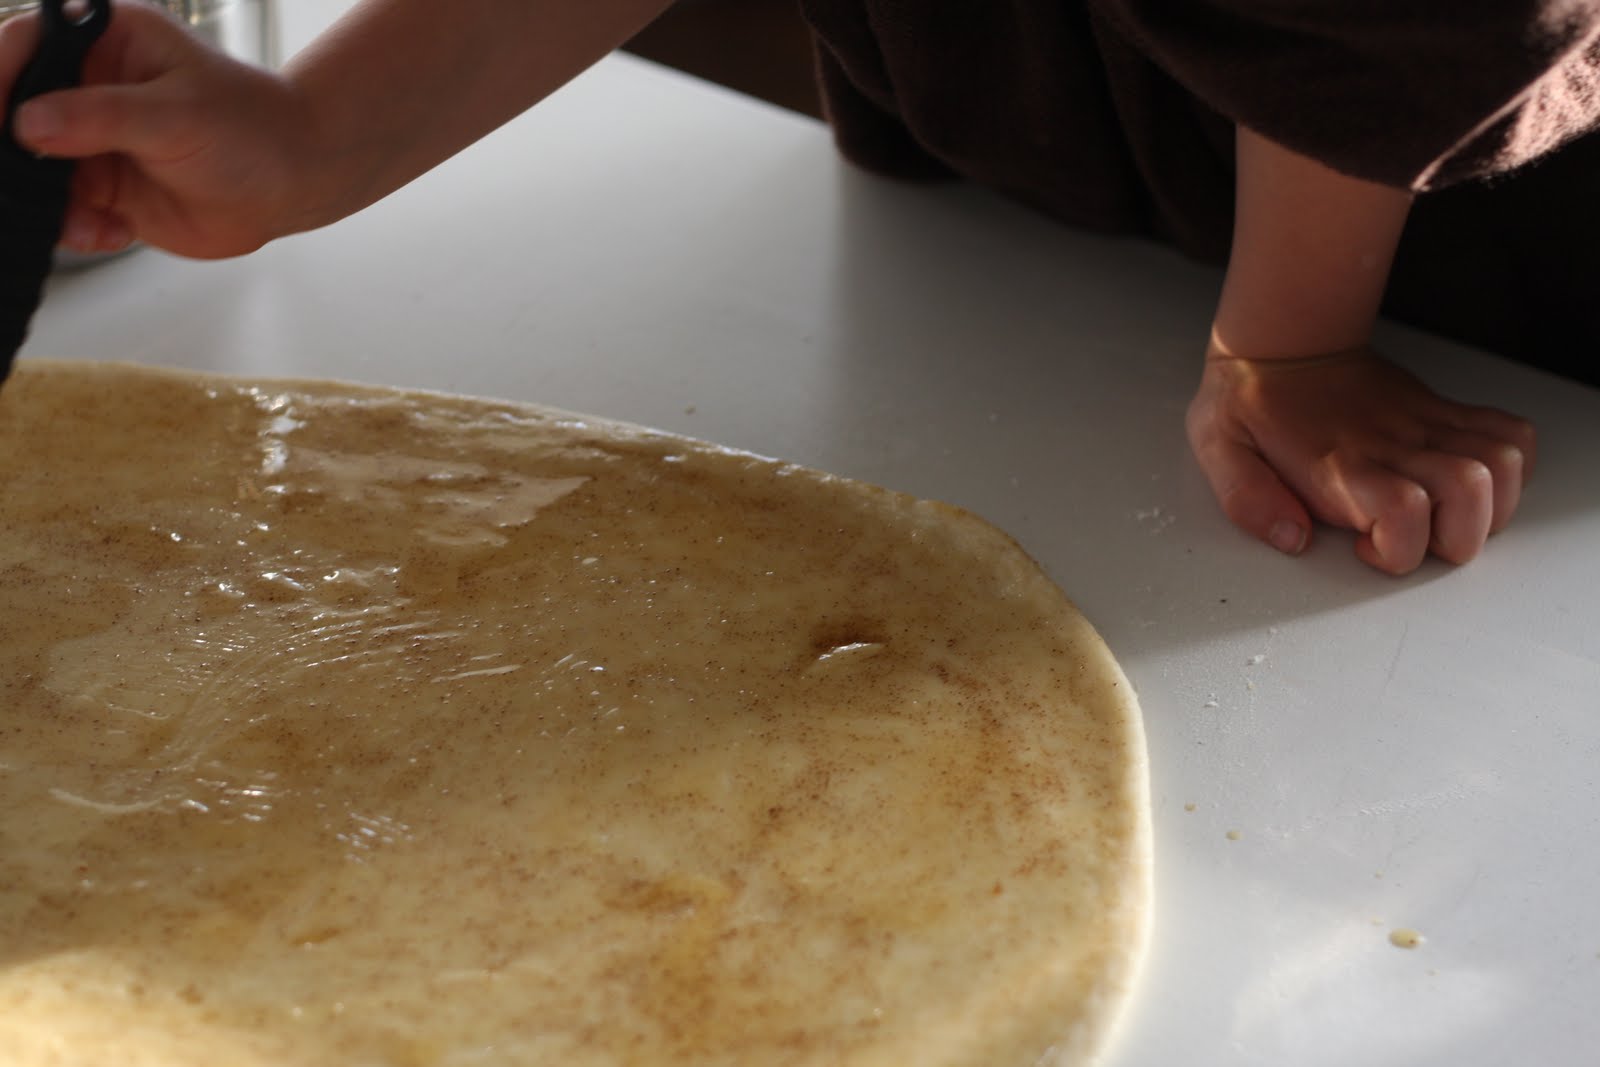
Deflate the dough. On a lightly floured surface, roll the dough out with a rolling pin into a rough rectangle about 12"x 20".


Use a pastry brush to spread the melted butter over all of the dough. It will seem like a lot of butter but try to use it all.


Sprinkle with all of the cinnamon and sugar* mixture. 


Cut the dough into six even strips across the width of the rectangle.


Stack the strips on top of one another and slice the stack into six equal slices again.


Arrange the dough squares in the loaf pan like you would put cards in a card-file - standing up. 


Cover with a towel and let rise in a warm spot for about 40 minutes or until almost doubled. Meanwhile preheat the oven to 350 F. When the dough has risen bake in the oven for 35 minutes, until the top is very brown. (If you take it out when it is golden brown the center may still be undercooked.) Remove from the oven and let rest in the pan for 20 minutes (or if you are just too impatient like we were - about 5 minutes). Loosen the edges of the bread with a knife and invert the pan onto a clean board. You can use a plate to turn it right side up if you want but again we were too anxious to tear into it so it was served upside down - nobody seemed to mind a bit.


We had a great time together with this bread - both making and eating it. Deacon and Aubrie did most of the work with only a little direction for each step, making this a super baking project to do with kids (or for beginning bakers). Everybody felt so successful. Did I mention how absolutely delicious this is?


* In these pictures we were using white sugar but brown is much better.

12.3.11

Getting Closer (Bread-wise)

Update on my personal challenge to learn to bake a really good French-style loaf: getting closer. (The little mouse in my pocket would like you to know that although the above statement was delivered with suitable off-handedness, I am actually trying not to hop with excitement.)


Very close to the top of my Christmas Wish list this last year was a request for The Essential New York Times Cook Book  by Amanda Hesser. Wanting it desperately, I was prepared that it would not be among the packages under the tree. But happy, happy surprise.... it was. I had seen the cookbook in a shop window that I passed back in November and it caught my eye. When I checked it out at the bookstore, the appeal grew. And after 2 months of reading (uh huh, reading ) it I can openly publish my firm opinion. LOVE it! The reading is interesting but the best part? the recipes are easy to follow and the results are fantastic. At least for every recipe I have tried so far. Among notable successes was this recipe for bread.


The title promises something that I didn't really believe was possible. I had tried another recipe that billed itself as 'no-knead' and although it is true that no true kneading was required, vigorous stirring was - so it was a bit misleading to say it was 'no-knead'. This bread however really, truly, is not kneaded. The only drawback is the long rising time. That in itself is not a big deal. It just took me a couple of months to remember that I needed to start the day before (or get up really, really early!). I finally got myself together enough to try and the result was pretty close to perfection. I really didn't think it was possible to produce this kind of loaf at home. The crust is great - rustic, crackly and crisp. The texture of the bread? ........mmmmmmmmmmmmm. Best of all? Super easy.


This  is much closer to the bread I aspire to make - it may be that bread.


No-Knead Bread


3 cups flour
1/4 tsp instant yeast
1 1/4 tsp salt
1 1/2 cups plus 2 Tbsp cool water
cornmeal or wheatbran as needed


Combine the flour, yeast, and salt in a large bowl. Add the water and stir until blended; the dough should be shaggy, moist, and sticky. (I needed to add quite a bit more water then the recipe called for. Breadmaking is a bit of an art in that the moisture content of the flour can vary greatly and often judgement is called for. In this case, I added about 3/4 cup more water.) Cover the bowl with plastic wrap and let rest for 12-(preferably)18 hours at a warm room temperature.


Lightly flour work surface and scrape dough from bowl onto it. Sprinkle with a little more flour, and fold it over onto itself once or twice. Cover loosely with plastic wrap and leave for about 15 minutes.


Generously coat a cotton or linen towel with cornmeal, wheat bran, or flour. Using just enough flour to keep dough from sticking to your fingers, gently form the dough into a ball and place it seam-side down on the prepared towel. Dust with a little more cornmeal (or whatever) and fold the sides of the towel over the top of the ball so it is nicely covered. Let rise for 2-2 1/2 hours.


At least 30 minutes before the dough will be finished rising, heat the oven to 450 F. Put a covered 6-8 quart heavy pot (cast iron, enamel, Pyrex or ceramic) in the oven as it heats.


When the dough is ready, carefully remove the pot from the oven. Uncover the dough and gently slide your hand under the towel. Turn the dough over into the pot. It sounds like it could be a disaster but it was pretty smooth. If it looks like a mess that's okay - it will end up fine.


Cover the pot with the lid and bake for 30 minutes, then uncover and bake for another 15 minutes or until the loaf is beautiful and brown. Cool on a rack.


This recipe became the foundation for Jim Lahey's book My Bread: The Revolutionary No-Work, No-Knead Method. With a title like that how can one resist checking it out. I could not and it is a cookbook that I would love to add to my (admittedly vast, maybe just large) collection. 

11.1.11

French Bread Challenge


One of my goals/desires for this year is to learn to make a really good French loaf. The kind with the great crust and nice chewy inside. This recipe is not that. It is however really good and has the virtue of being really, really easy. So easy in fact, that I have made it four times in the last 3 weeks. It also looks quite impressive, and I am not opposed to impressing. (On the odd occasion when I manage it, it is kind of fun!) So although this isn't the bread I aspire to make, it is a great recipe to have in the repertoire. Give it a try, wrap it up in some lovely parchment paper, tie it with some twine and take it to dinner next time you are invited. Promise you will impress.


No Knead French Bread


2 Tbsp instant yeast
1/2 cup warm water
2 cups hot water
3 Tbsp sugar
4 tsp salt
5 Tbsp extra virgin olive oil
5 1/2 - 6 cups flour
1 egg white
flaked sea salt


Dissolve yeast in 1/2 cup warm water. Let stand 10 minutes. In a large bowl combine 2 cups hot water, sugar, salt, oil and half of the flour. Stir very well - it will get nice and gluten -y. Stir in dissolved yeast and the rest of the flour to make a soft dough. Mix well. Leave spoon in batter and allow to rest for 10 minutes. Stir vigorously. Rest again for 10 minutes. Repeat 3 times. Turn dough onto floured board. Knead once or twice until coated lightly with flour. Divide dough in half. Roll each half into a  9"x12" rectangle. Starting at the long edge roll it loosely as for a jelly roll. Seal edge. Place both rolls seam side down, on one large baking sheet. Gash the top of each loaf diagonally three times with a sharp knife. Brush with beaten egg white and sprinkle with the salt flakes. Let rise 30 minutes. Bake at 400 F. for 35 minutes.


As for the French bread challenge....I haven't cracked it yet  - and I may not but I will have fun trying. And it is, after all, only January 11.


Although this isn't the ultimate French bread, I do have to say that it makes superior French toast. Seriously. Enough to justify making the bread - even if it wasn't absolutely yummy fresh.